3D scanning and printing
Introduction
This week our assignment is
• group assignment: test the design rules for your 3D printer• individual assignment: design and 3D print an object (small, few cm3, limited by printer time) that could not be made subtractively and 3D scan an object (and optionally print it)
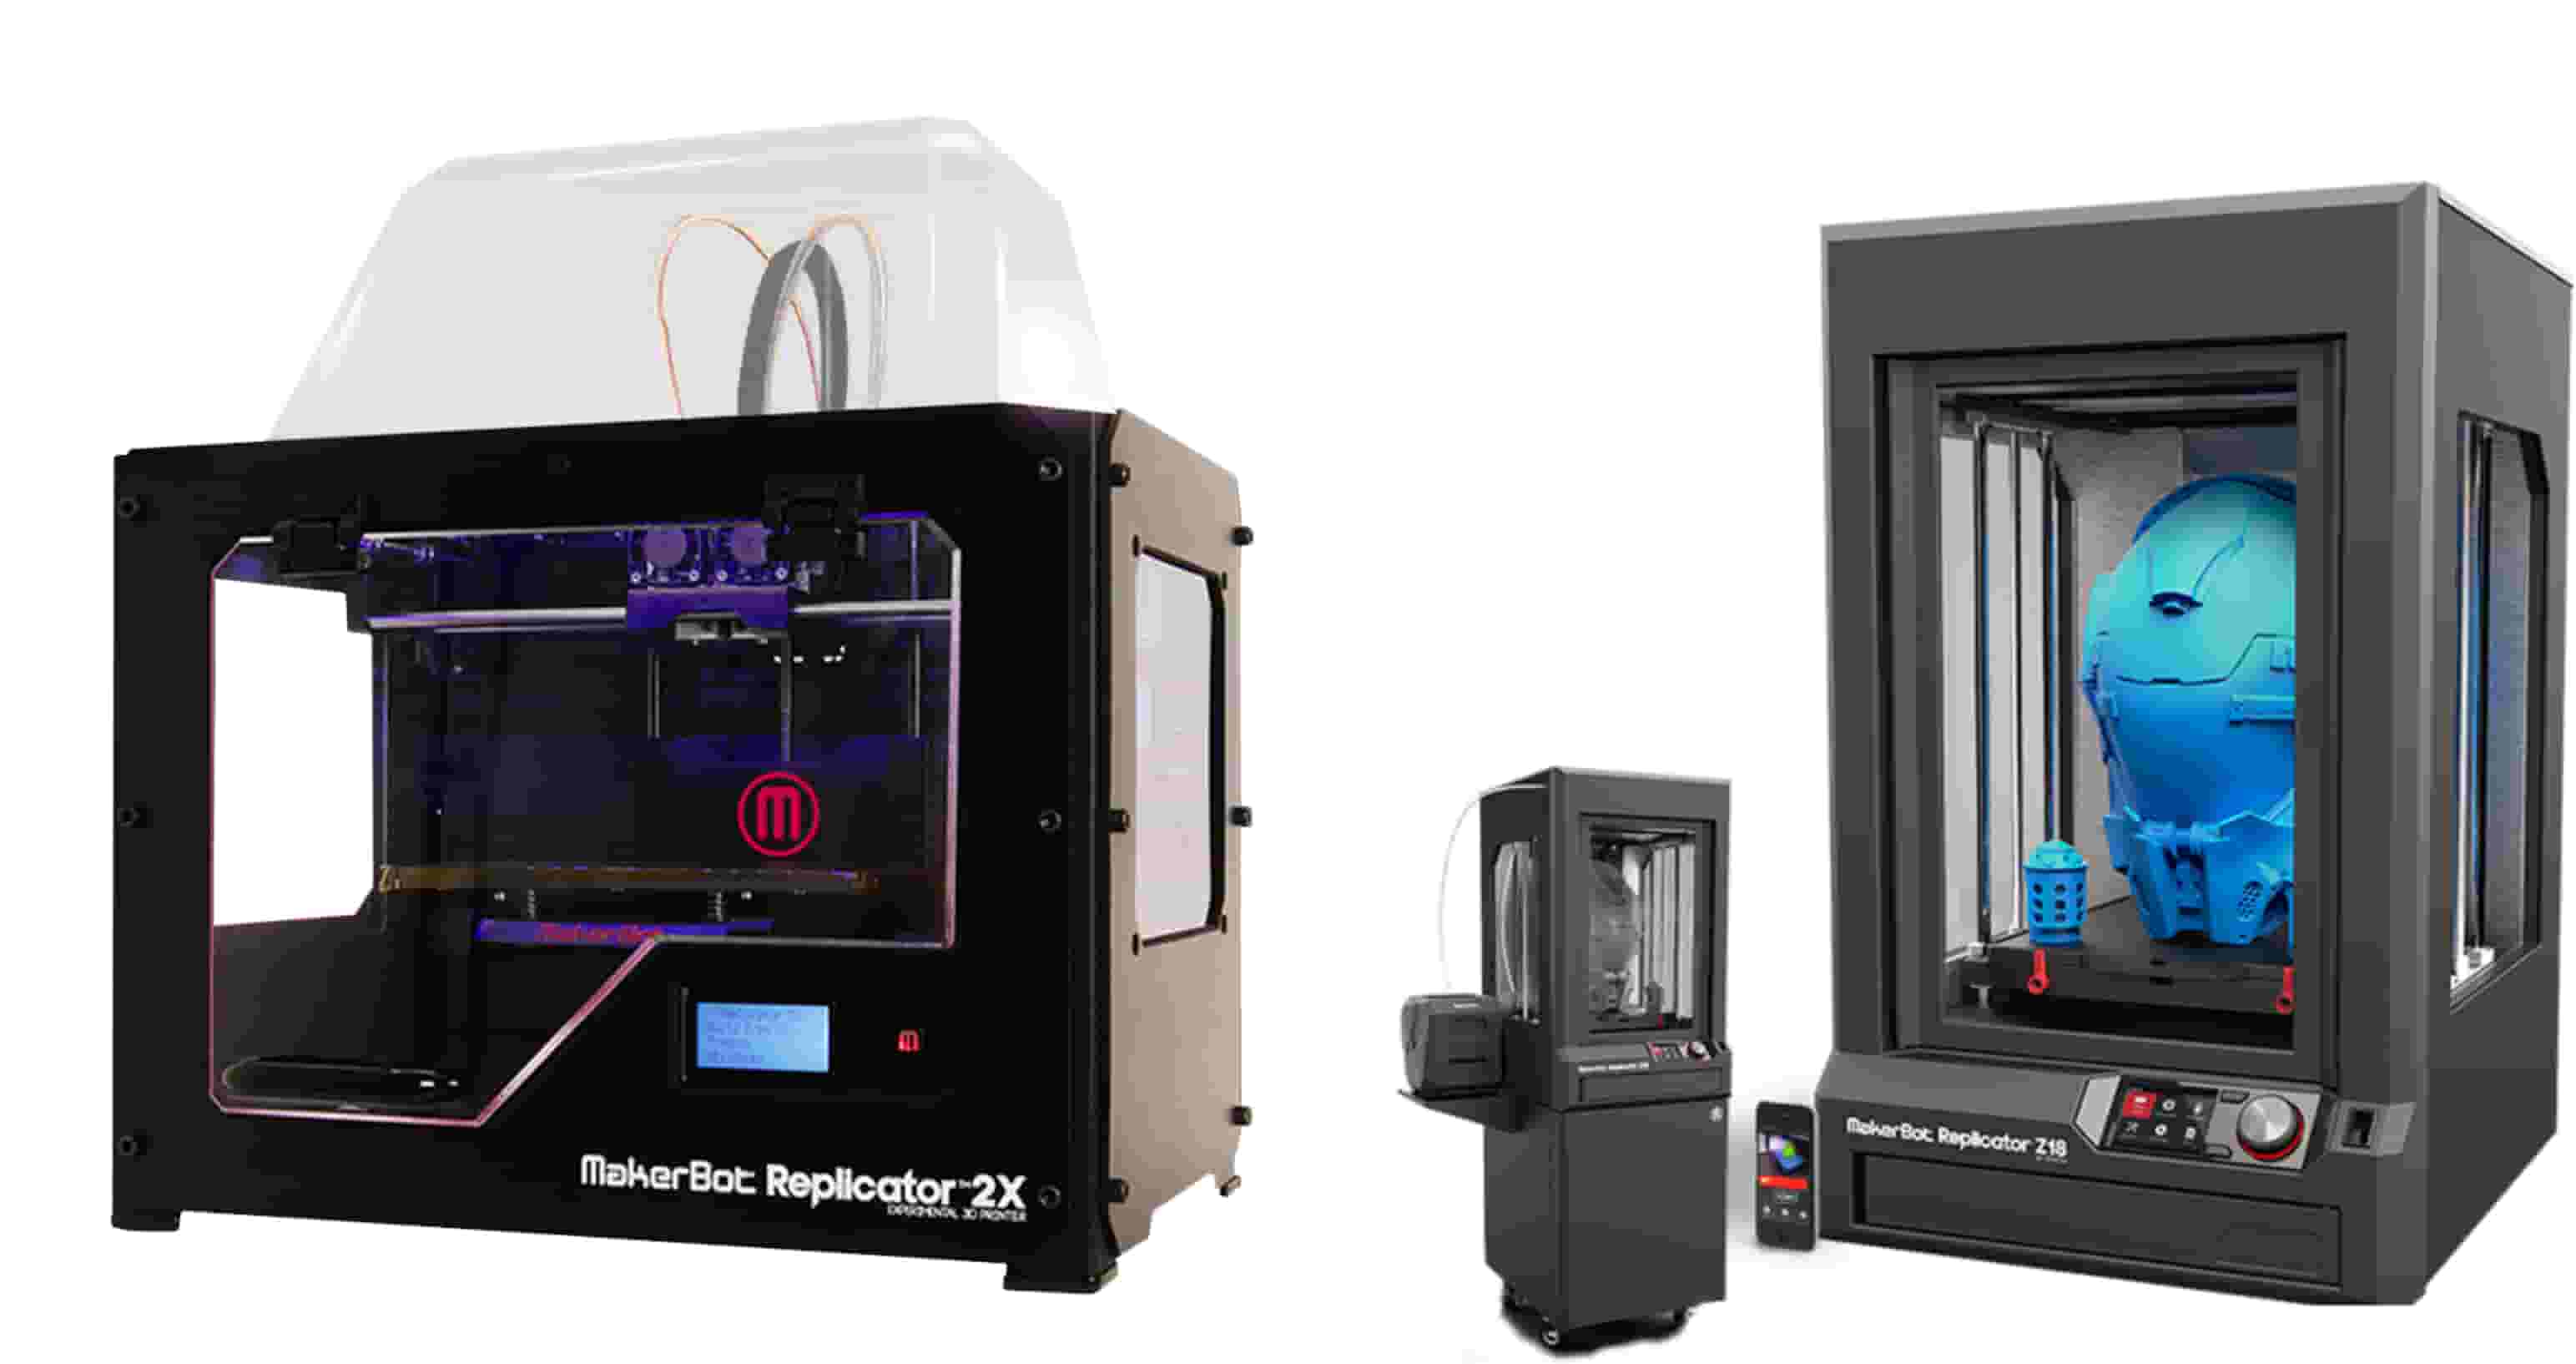
I like 3D printing very much. I saw operating 3D printer 8 years ago at Hannover messe and I fell in love․ And decided to establish 3d printing lab in Armenia and at 2014 I developed 3d Printing and CNC milling laboratories in Armenian technological centers. I used Makerbot replicator 2x and Makerbot Z18. 2x has 2 extruders and can print both ABS and PLA, Z18 has smart extruder and a camera inside, that allow to follow printing process and print only by PLA type of filament That years we organized different trainnigs for kids and teens, students from Armenian regions. They learned 3D modeling and printing.
During this week we should learn and test the design rules of our 3D printers. We used Makerbor replicator+ and Ultimaker 3D printers.
• Turn on the 3D printer and wait it to warm up.
• Choose the filament. If you need to change the printer filament, first you need to unload the existing filament by going to “Filament” and choosing “Unload filament ”, after unloading the filament change the filament and press “Load filament” .
• Print some 3D model which is already exist on your printer, for testing the printer. On Makerbot there are a lot of examples. You can choose them by going in “Print”, “Internal storage” , “Examples”. Also we downloaded some models from thinkivers and printed it for understanding our 3d printers limits. We printed 3D Printer Tolerance Test by mandaghassaei to test our printer capabilities. In the description of that file it was written "Tolerance tests for a high res 3D printer, designed with features beyond machine resolution". The first disturbing fact was that the machine was making odd noises while printing so our first guess was that lubrication was an issue. After some research we resolve the problem.
• Remove your 3D model from build plate after it’s finish.
.jpg)
Now a little bit about Ultimaker:
• 228.6 x 226.06 x 304.8mm Build Volume,
• Easily switch between 0.25, 0.40, 0.60 and 0.80 mm nozzles,
• It prints ABS, PLA, HIPS, PET, ColorFabb XT, ColorFabb XT-Carbon Fibre, Woodfill, Bronzefill, Copperfill,
• Brassfill and flexible materials such as PolyFlex and Ninjaflex
• Requires 2.85mm filament. Unfortunately, we had only 1.75mm MakerBot PLA Filament in the lab that was not compatible with Ultimaker. We decided to find a local shop that had that filament and we had only one day to clean the machine from dust lubricate, level the bed and load the filament. We decided to buy ABS to compare it with PLA. After I had to change my location and used one more printer Makerbot replicator 2. I changed the filament as I wanted to use transparent filament, cleaned it from dust, checked the table and started the printing process. All callibration functions are tha same as for replicator +.
What is 3D printing
3D printing or additive manufacturing is a process of making three dimensional solid objects from a digital file. 3D printing is done by building up the object layer by layer. Usually, 3D printers use plastic, because it is easier to use and cheaper. Some 3D printers can 3D print with other materials, like metals and ceramics. 3D models must be first sliced into layers since the 3D printer prints out model layer by layer. The slicing algorithm plays a very important role in the 3D printing process. The most common technique for slicing is the produce contour data from STL files. STL file approximates the surfaces of an object with many small planar triangular facets, a process called tessellation. STL file is easy to manipulate within the process-planning system. The technique of CNC machines is drilling or cutting, so it removes material while the 3D printer adds material.There are seven different types of 3D printers
• Fused deposition modeling (FDM)• Stereolithography(SLA)
• Digital Light Processing(DLP)
• Selective Laser Sintering (SLS)
• Selective laser melting (SLM)
• Laminated object manufacturing (LOM)
• Digital Beam Melting (EBM)
Firts of all I read the user manual of 3D printer, learn about the specification of the machine, after calibrate it.
Specification of Makerbot replicator 2
• Print Technology - Fused Filament Fabrication• Build Volume - 28.5 x 15.3 x 15.5 cm
• Layer Resolution Settings - high 100 microns, medium 270 microns, low 340 microns
• Filament Diameter - 1.75 mm
• Nozzle Diameter - 0.4 mm
• File Types - .stl, .obj, .thing
• Connectivity - USB, SD card
• Filament type - PLA
Step 1 - 3D modeling and printing
I decided to make a car from my favorite cartoon.
I used Fusion 365 for this assignment and try parametric design in Fusion.
• Create sketch failed and tried again. (Sketching and parametric process),started from the wheels
• After sketching I extruded 2 D shapes
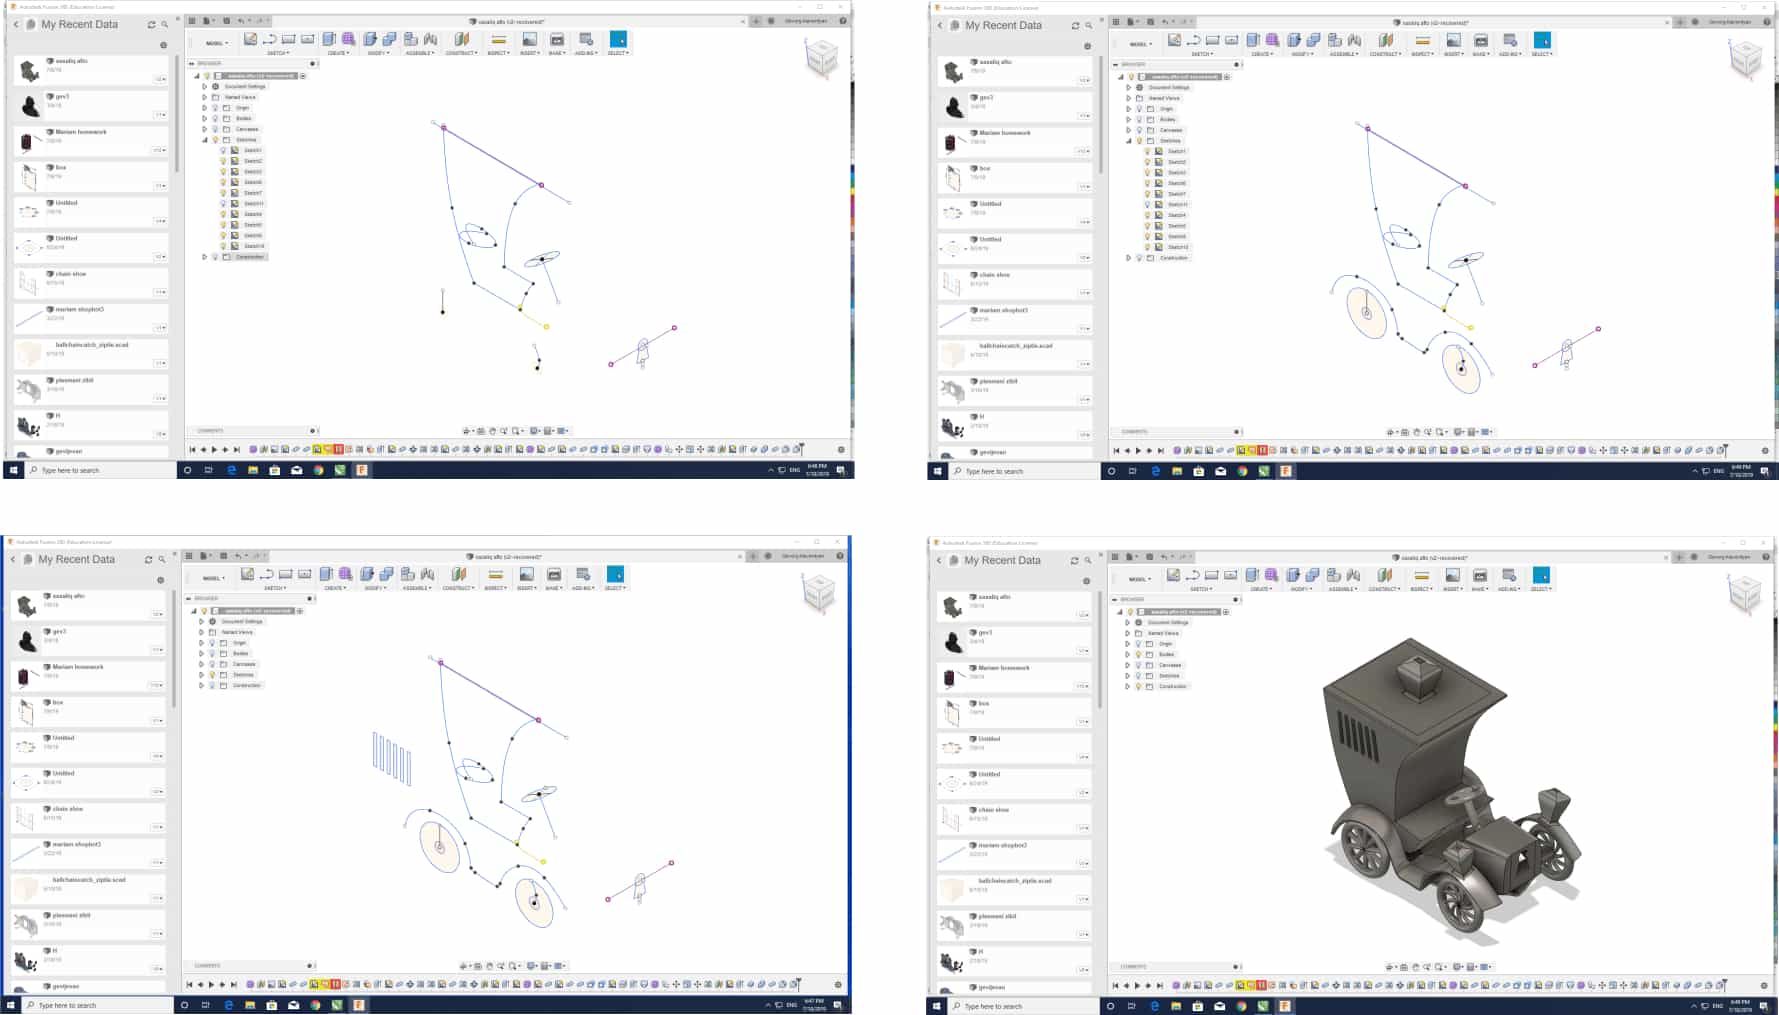
• Turned the 2D sketch into a 3D object by expanding it from the plane
• Assembled all parts
• Exported to .Stl
I needed to export file to .stl, as our 3D printer accepts the following type of files .stl, .obj, .thing. Here you can see how to export file to .stl
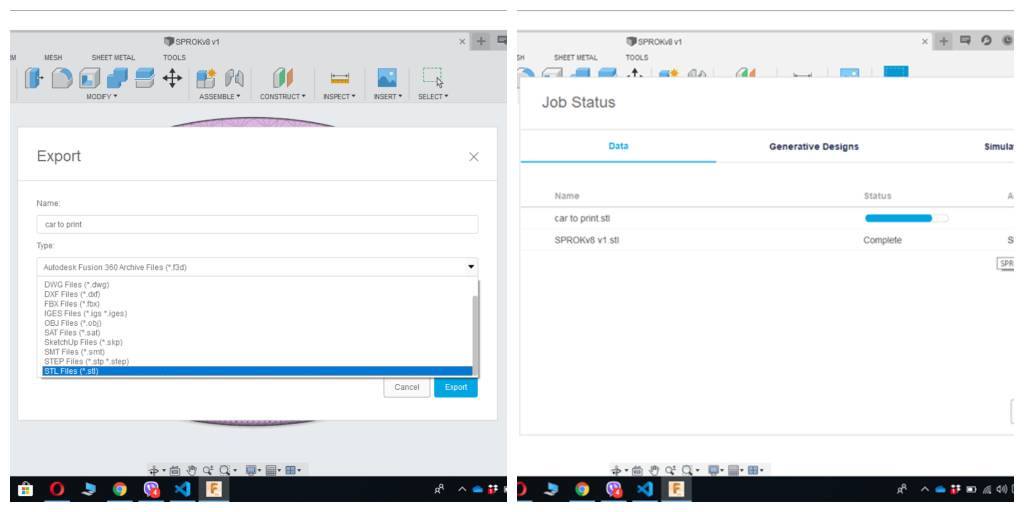 stl export
I put PLA Filament into the 3d printer and prepare file to print
I opened the software uploaded the
file - gave the size of printing -pushed on board - send to review - after
start printing.
stl export
I put PLA Filament into the 3d printer and prepare file to print
I opened the software uploaded the
file - gave the size of printing -pushed on board - send to review - after
start printing. I used makerbot desctop as I connected the 3D printer to computer and decided to print it from computer not from SD card. Before installing the makerbot desctop, the lab used makerbot print, but I had some difficulties, that's why we decided to change it (that was advice of some experianced friends).
Here are some of slicing parameters:
• Infill - 10%
• Infill layer height - 0.2 mm
• Infill pattern - linear
• Temperature - 230 degree of Celsius etc.
Used "infill density" to set the density of the printed object’s internal support structure. If an object is printed with 100% infill, it will be completely solid on the inside. The printed object will be heavier and stronger. It will take more time and consume more filament. As I created the car to display, I used 10% infill. If we need something that is going to be more functional and sturdy, 75-100% infill is more appropriate. Used "infill layer height" to set my infill to print at a different layer height than the layer height set in the "model properties" section. This allowed me to speed up the print without sacrificing surface quality. Infill layer height should always be set to a multiple of "layer height". "Linear infill" is made up of parallel straight lines, perpendicular to the lines on the previous layer. "Linear infill" is fast to print, and makes the toolpath simpler. Support structures are helpful when printing models with overhangs and long bridges. As my printer is connected to MakerBot Desktop, the software will recognize the extruder type. Seted the temperature for the extruder using the "Extruder Temperature" setting. Travel moves are parts of the toolpath where the 3D printer’s extruder moves without extruding any plastic. Use "Travel Speed" to set the extruder speed for travel moves. If we set a travel speed outside the recommended range, our setting will show up in red and a note will remind us that the setting is outside of the recommended range.
.jpg)
I gave supports as the model has many parts, which needed support for construction. The duration of printing process was 10 hours. The firts try of the printing failed because of extruder. During the printing process the extruder stopped printing, it was dirty and I had to clean it.
I watched these videos and read the article
• Disassembling extruder
• How to Clear Thermal Barrier Tube
• Extruder Unclogging on Replicator 2 After cleaning the extruder, I started printing again.
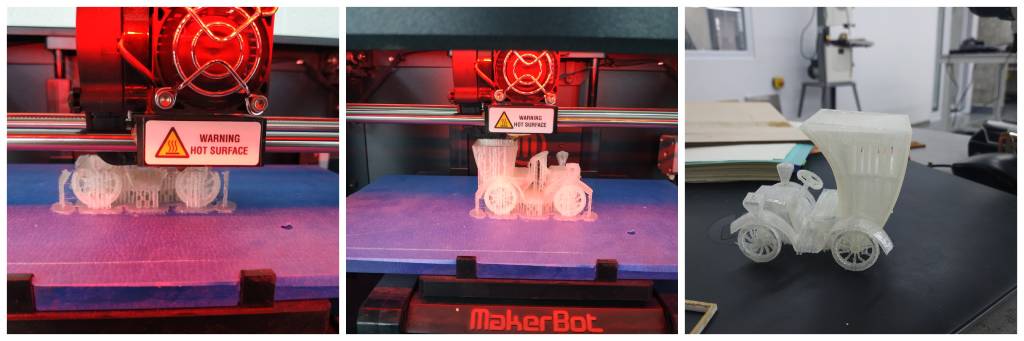 printing process and printed car
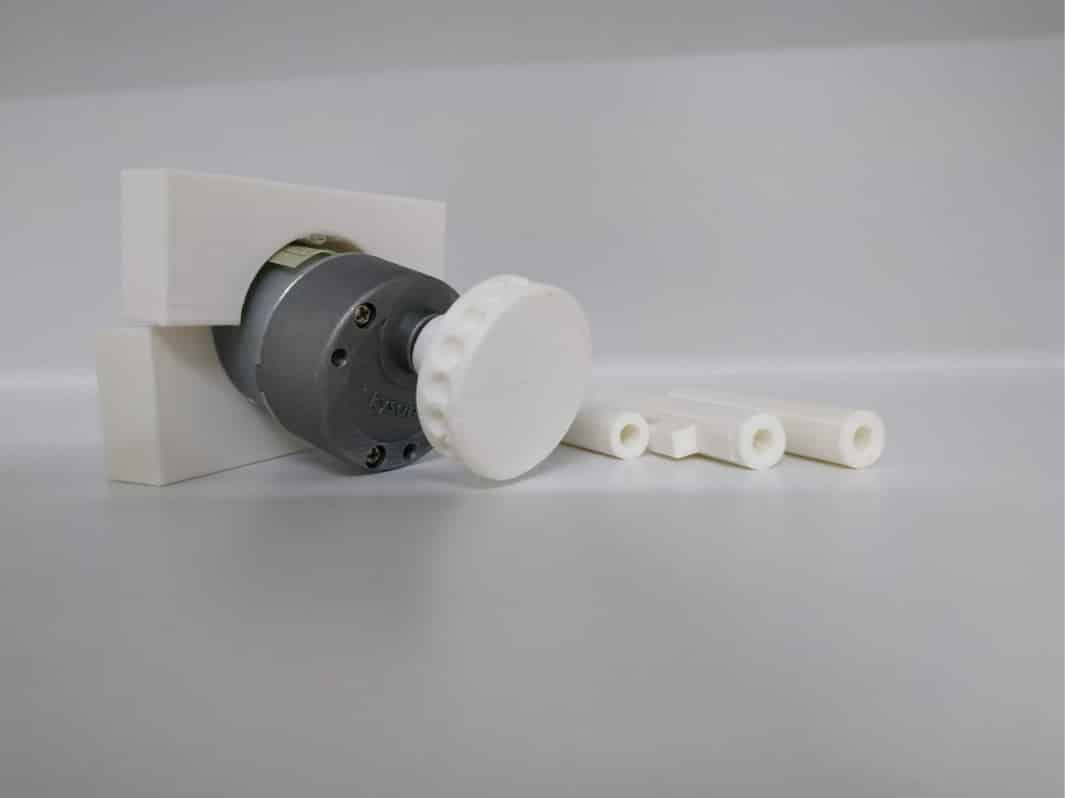
I should note that was very dufficult to design and print a gear, I printed the gear for 5 times. Every time the teeth didn't match with shutter blind. I gave supports and it was very difficult to remove from the gear.
Here is the video of 3d printing process
Step 2 - 3D scanning
3D scanning is the process of analyzing a real-world object or environment to collect data on its shape and possibly its appearance. The collected data can then be used to construct digital 3D models. 3D scanners can be based on many different technologies There are a variety of technologies for digitally acquiring the shape of a 3D object. Before starting scaning process I watched some tutorial videos• 3D Scan with Xbox Kinect and K-Scan: Beginners Tutorial
• Beginners Tutorial
• 3D Scanning With the Kinectl
• Scan and 3D Print Yourself
• Kinect 3D Scanning Software KScan3D Tutorial - Part 1: Capturing Single Scans
I tested 2 type of 3D scanners Kinect Xbox 360 a and 3D sense
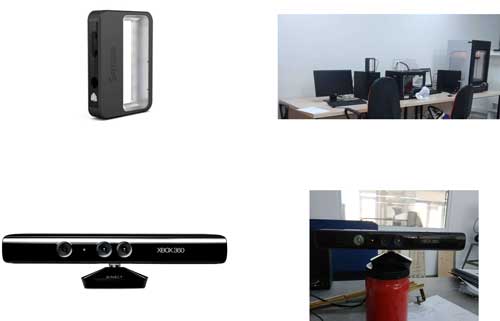
Started from Kinect, installed KScan3d 3D 1.2 software for 3D scanning
Here is some photos of the process
Tried different times to scan my colleague by kinect and did not like it.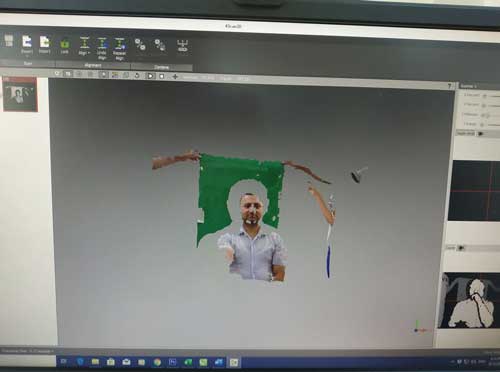 After I decide to scan myself.
I did the following mistakes during the scaning
After I decide to scan myself.
I did the following mistakes during the scaning
• Not enough light.
• Tried scan and rotate by myself. So I added lamps for scaning, asked Babken to help me click the mouse. The most important part is the strong light.
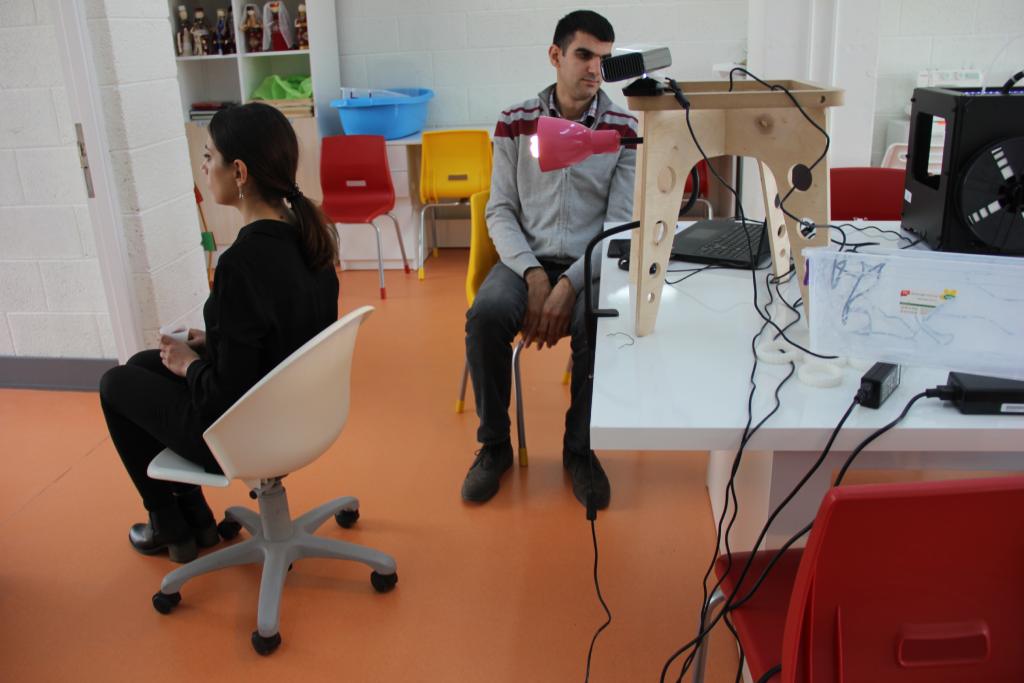
Took about 75 photos in one rotation.
How to make a 3D model
• "Ctrl A "- for selecting all pictures
• “Mesh editor” and press “Build”
• After press “combine”
• Press “Finalize”
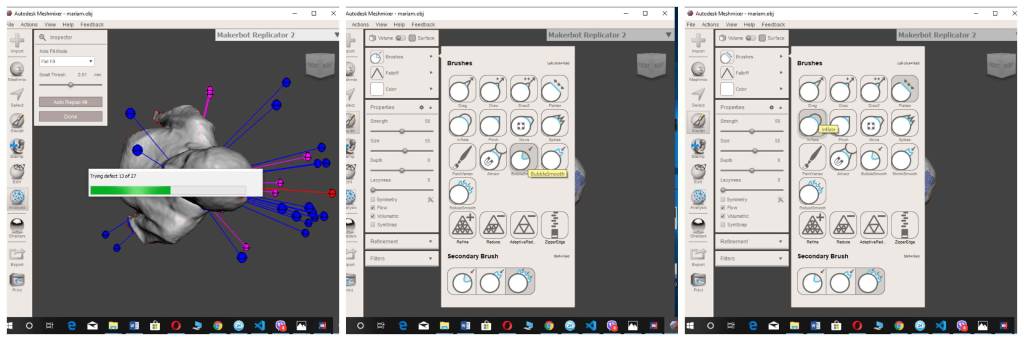
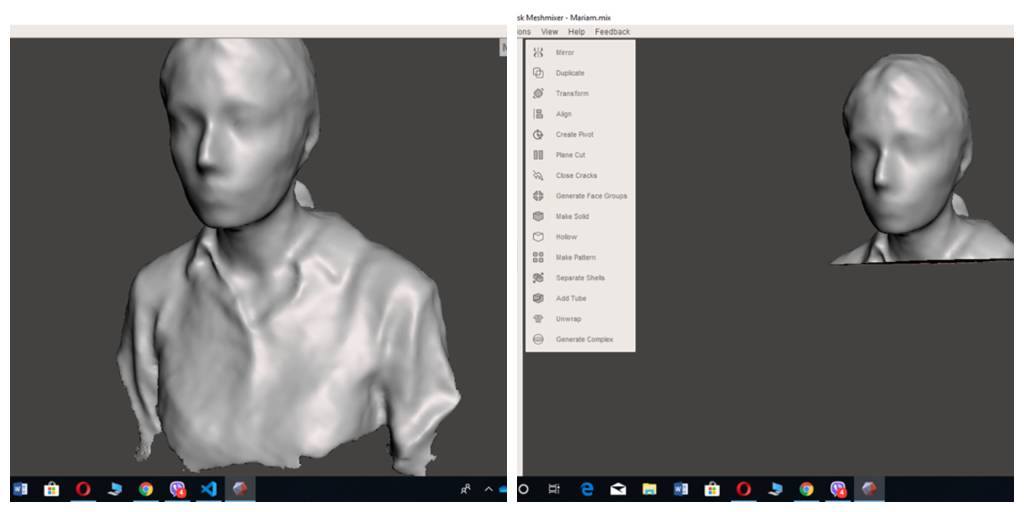
• Export file to .obj format, of course I could export to .stl file format too. I chose Autodesk Meshmixer for sculpting. I opened my .obj file.
• Chose Makerbot 2 replicator 3D printer in right side .
• Minimized your 3D model and drag it on platform
• I filled all holes by going in to “Analysis > Inspector ” and press “Auto Repair All”
• “Flatten” in “Sculpt- Brushes”
• “Inflate” in “Sculpt - Brushes”
• “Bubble smooth” in “Sculpt - Brushes”
• "Plane cut" in "Edit"
After I exported to .stl file format.